Cube Trainer help
You solve on a real smart cube, the app follows every move live. Below are all tabs of the app and, at the end, the most important terms.
The bar at the bottom shows the four tabs you need with the cube in your hand. All others sit behind Menu ▴ at the far right – tap it and they unfold above.
- Getting started
- Solve
- Coach
- Trainer
- Cases
- Stats
- More
- Basics
- Finger tricks
- Camera
- Holding & finger tricks
- Notation
- Terms
- Questions
Getting started
Signing in and installing as an app
You sign in with your e-mail address and receive a sign-in link (valid for 24 hours, usable once). If the link opens where you requested it, you are signed in at once. If it opens in a different browser, the page asks whether you want to sign in here — or you type the six-digit code from the same mail into the app (“Code from the mail”). After that you stay signed in as long as you use the app (one year from the last use). On the phone it is worth installing the trainer as an app: in the Chrome menu “Install app” or “Add to home screen”.
Browser: Chrome or Edge on Android, Windows or Mac. On the iPhone no browser can connect Bluetooth cubes at the moment.
Connecting the cube
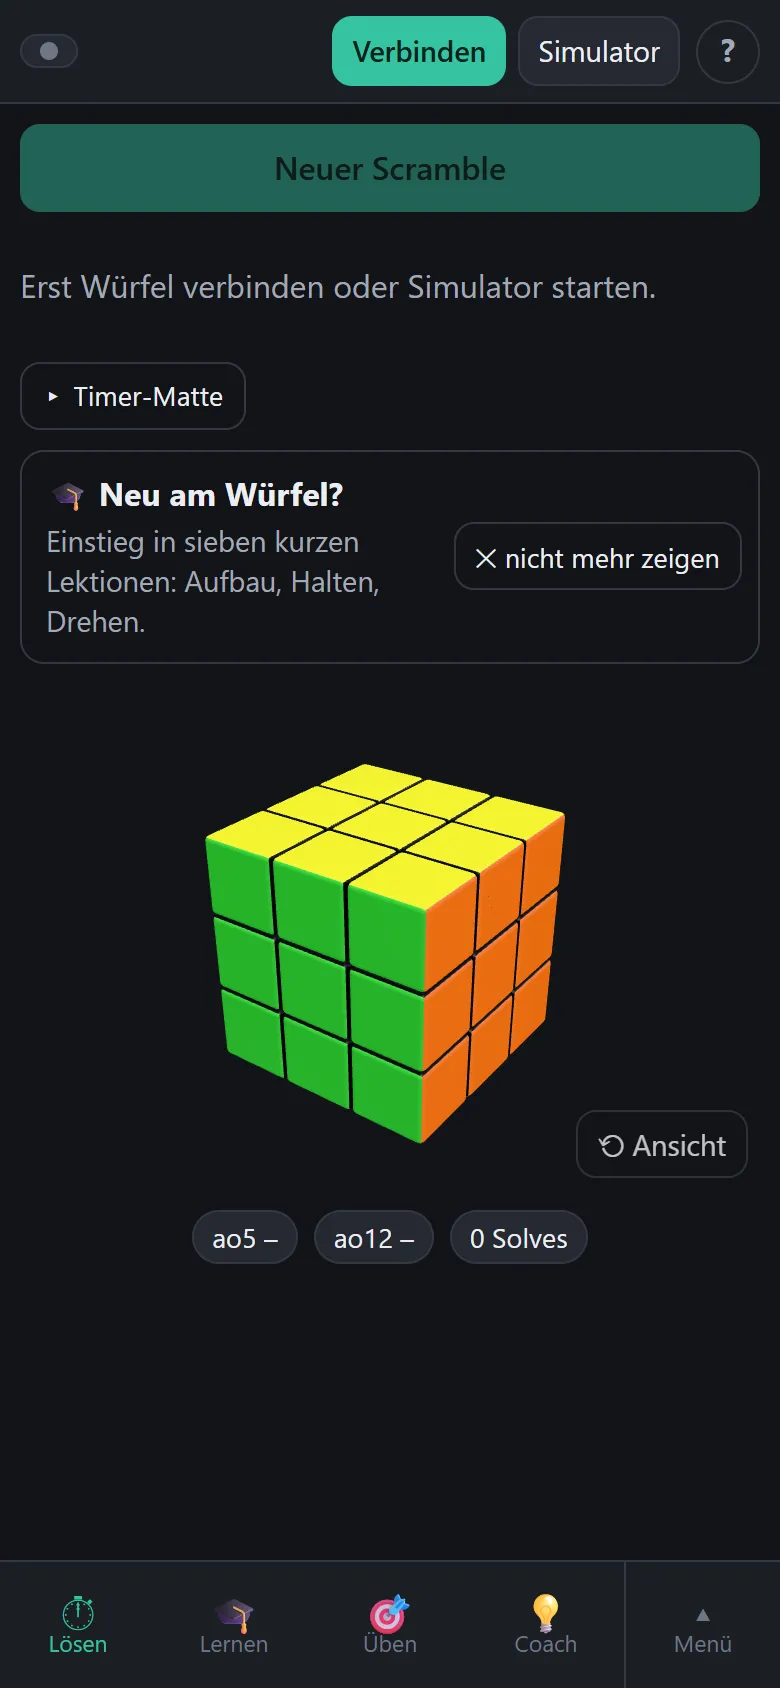
- Switch Bluetooth on at the phone or PC and turn the cube briefly so it wakes up.
- Tap Connect at the top and choose the device
GAN…. - The very first time the app asks for the MAC address of the cube (see below).
Without a cube everything works with the Simulator too: keys below the 3D cube, or the keyboard on a PC (U R F D L B, with Shift counter-clockwise).
Which cubes work
Since 0.20 the app connects more than GAN. Connect lists every known smart cube in the device chooser; which protocol the cube speaks, the app finds out itself:
- GAN – all generations (GAN 356 i, 12 ui, 14, 16 ui …), with orientation sensor.
- MoYu – WeiLong AI (V10, V11), AI 2023, MHC series; the WeiLong AI cubes have an orientation sensor.
- QiYi AI Smart Cube and XMD Tornado V4 – no orientation sensor, the picture stands still.
- GoCube and Rubik’s Connected, Giiker – no orientation sensor.
GAN, MoYu and QiYi encrypt their data with the Bluetooth address (see below); for QiYi and MoYu the app first tries to derive it from the name and asks only then. Without an orientation sensor the 3D picture does not follow your hand – everything else (coach, practice, timer) works the same.
The MAC address
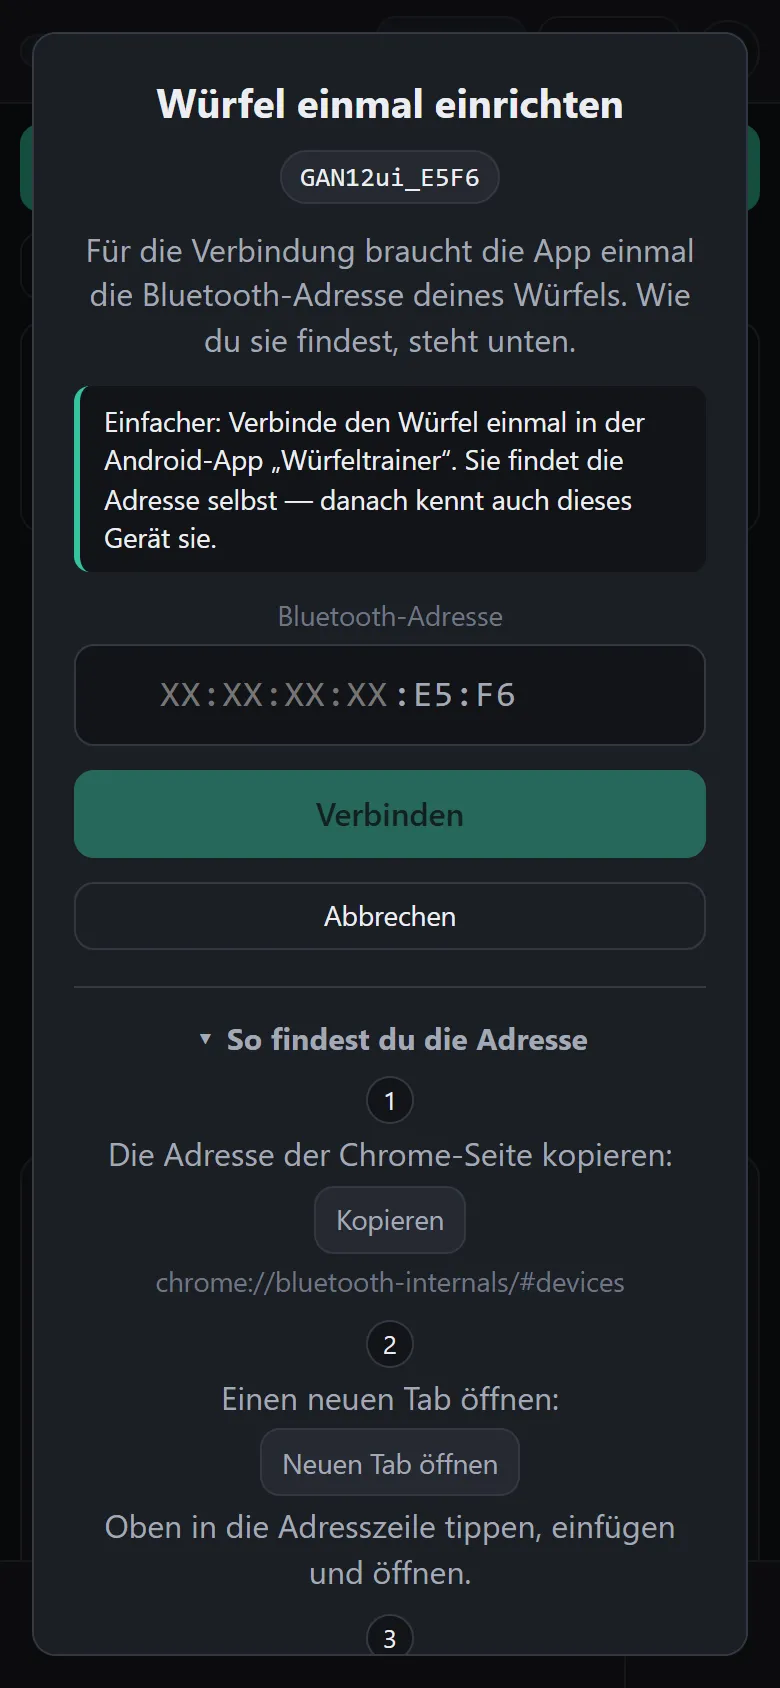
GAN encrypts the cube data with the Bluetooth address of the cube, and browsers do not reveal this address.
So you enter it once. The app shows you where to find it (chrome://bluetooth-internals/#devices
in a new tab → “Start Scan” → column “Address”) and already knows the last two digits from the name of the
cube. The address is stored in your account; you can see and delete it under More → Cube &
connection.
When the picture does not match the cube
On connecting, the app takes over the state the cube itself knows. If it was off or was turned without a connection, the picture is wrong. Then solve the cube by hand and tap ✓ Solved at the top (twice, to be safe). If a move got lost on the way, the app notices it itself and reconciles.
Solve – the timer
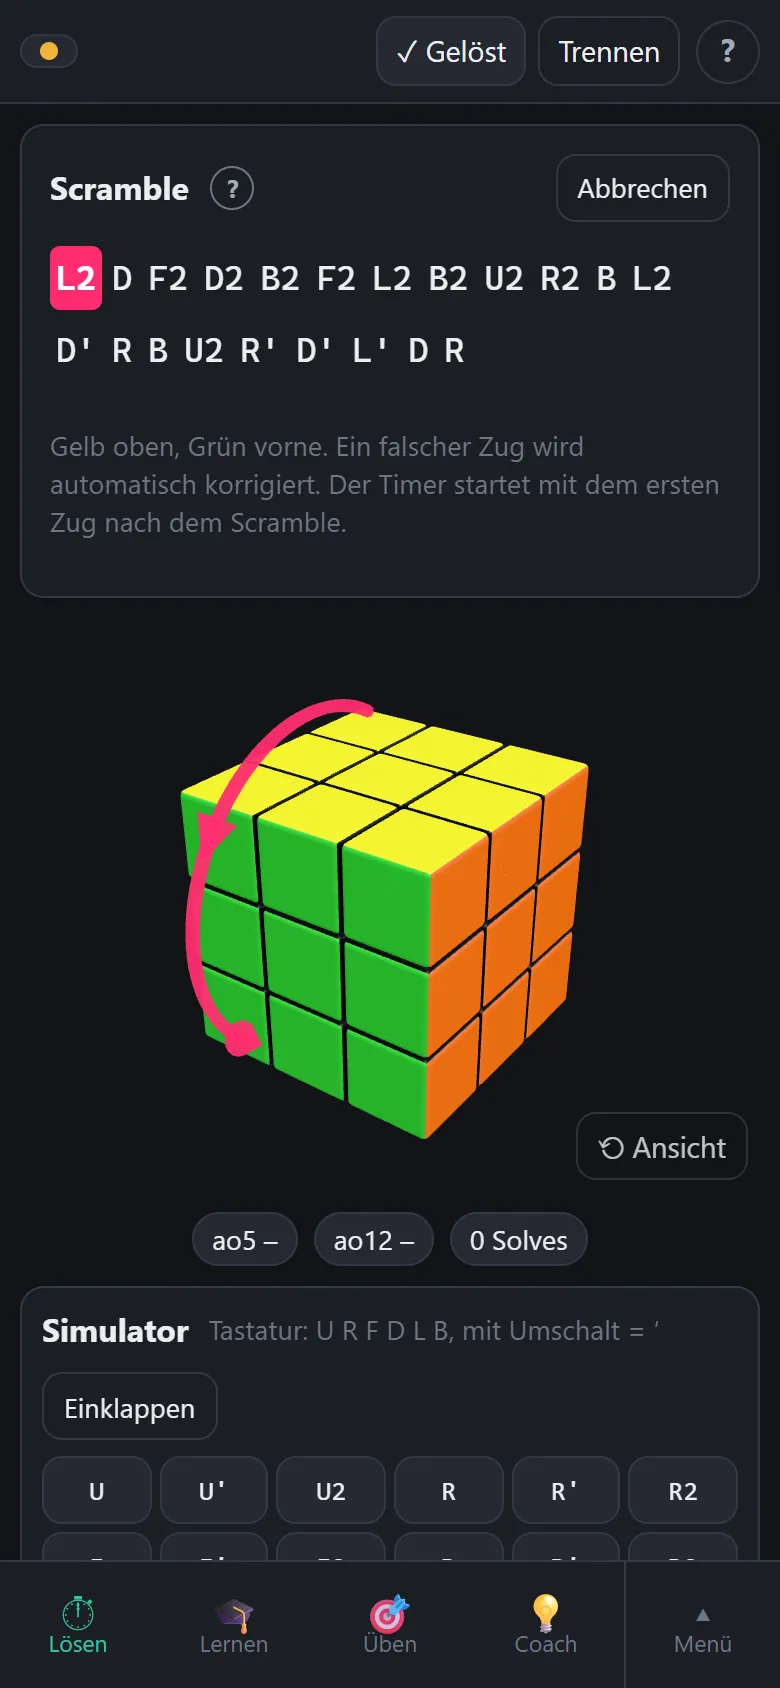
- Tap New scramble. The app computes a scramble from your current state – you do not have to solve the cube first.
- Turn the scramble. If you turn wrong, the app shows the way back (“Off track – undo with …”) or recomputes the rest of the sequence.
- Then the inspection begins: 15 seconds to look, as in competition (sounds at 8 and 12 seconds). The first move starts the time.
- Solve. When the cube is solved, the time stops by itself.
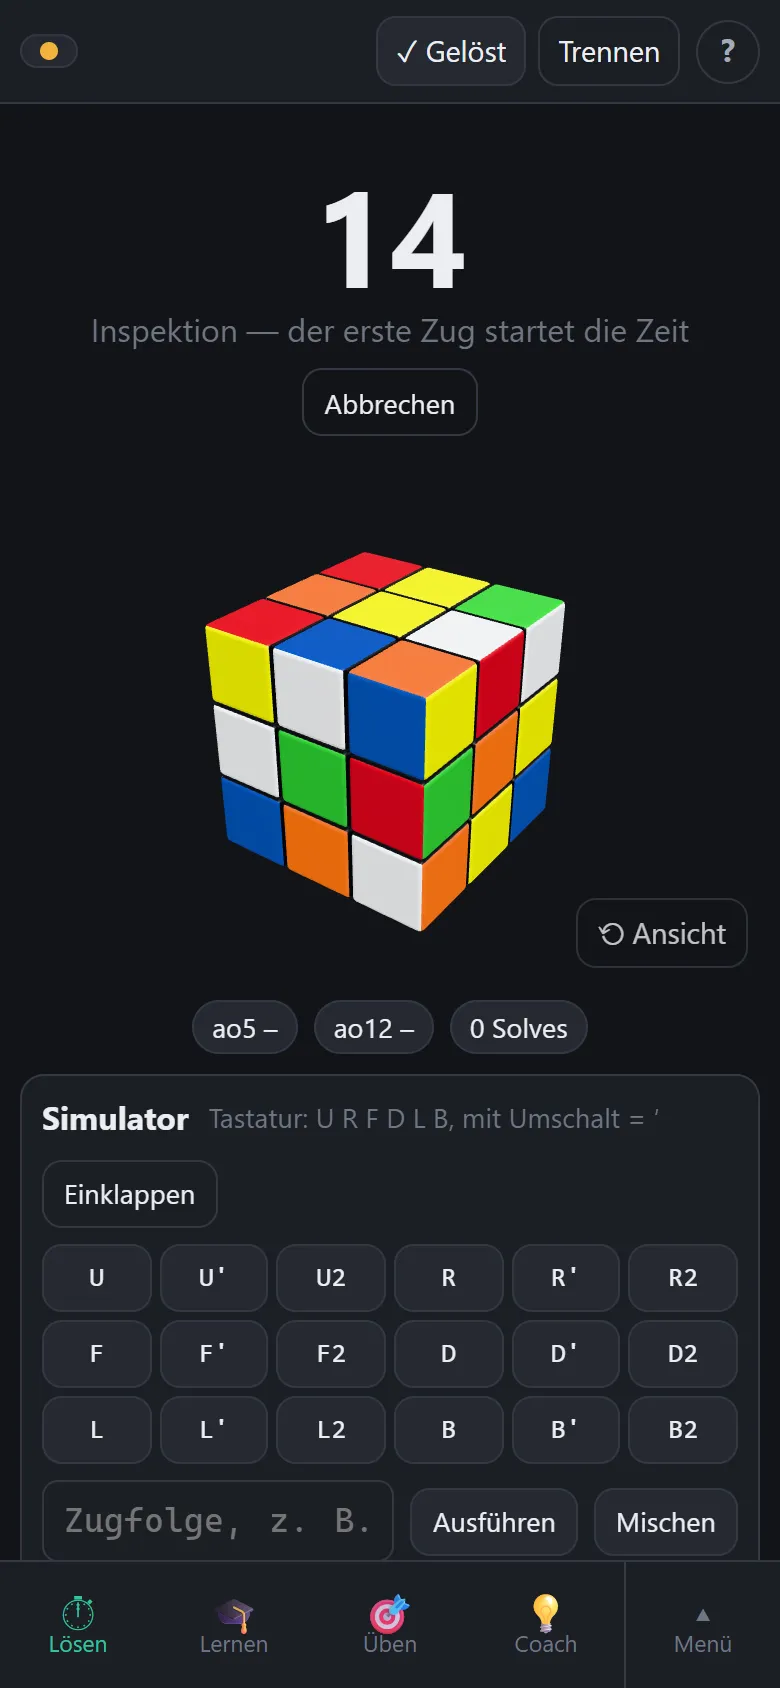
The result shows time, moves (HTM), turns per second and a split into the phases cross, four pairs, OLL and PLL – each with its recognition time and the shortest way for exactly that step. Below you can assign +2 or DNF or delete the solve.
The inspection can be set to unlimited under More → Timer. With Solve without scramble you solve a cube you scrambled yourself. Cancel ends a running time without saving.
Sharing a solve
In the result (and in the stats for every old solve) there is 🔗 Share: the app stores the solve on the server and gives you a link. Whoever has it sees time, phases with recognised cases and the replay – without an account. Your e-mail address is not shown, only your display name if you set one. Revoke sharing deletes the page again.
The result also shows, per phase, the recognition time, the turns per second (TPS) and the recognised case (pair, OLL, PLL); the longest pause of the solve stands at the top as a chip. The recognised cases count towards the case statistics, just like attempts under Practice.
Timer mat
Under Solve → Timer mat you connect a mat; it then measures the time as in competition: hands on, lifting starts, hands on stops. With a smart cube the mat's time counts, but the cube still has to be solved (otherwise DNF). Without a cube you get the scramble as text and the solve is saved with the time alone – no moves, no phases.
- GAN Smart Timer and Halo – over Bluetooth, like the cube. StackmatLink (the open bridge for cable timers) reports the same way.
- Cable timers (Speed Stacks StackMat, QiYi, YJ and others) – with the jack cable from the timer into the headset or microphone socket (on a phone usually via a USB-C adapter). The app asks for the microphone once and reads the mat's signal; nothing is recorded or stored. If no time appears after five seconds, check the cable and the timer's volume – some timers only send with the volume up.
Coach – the next step
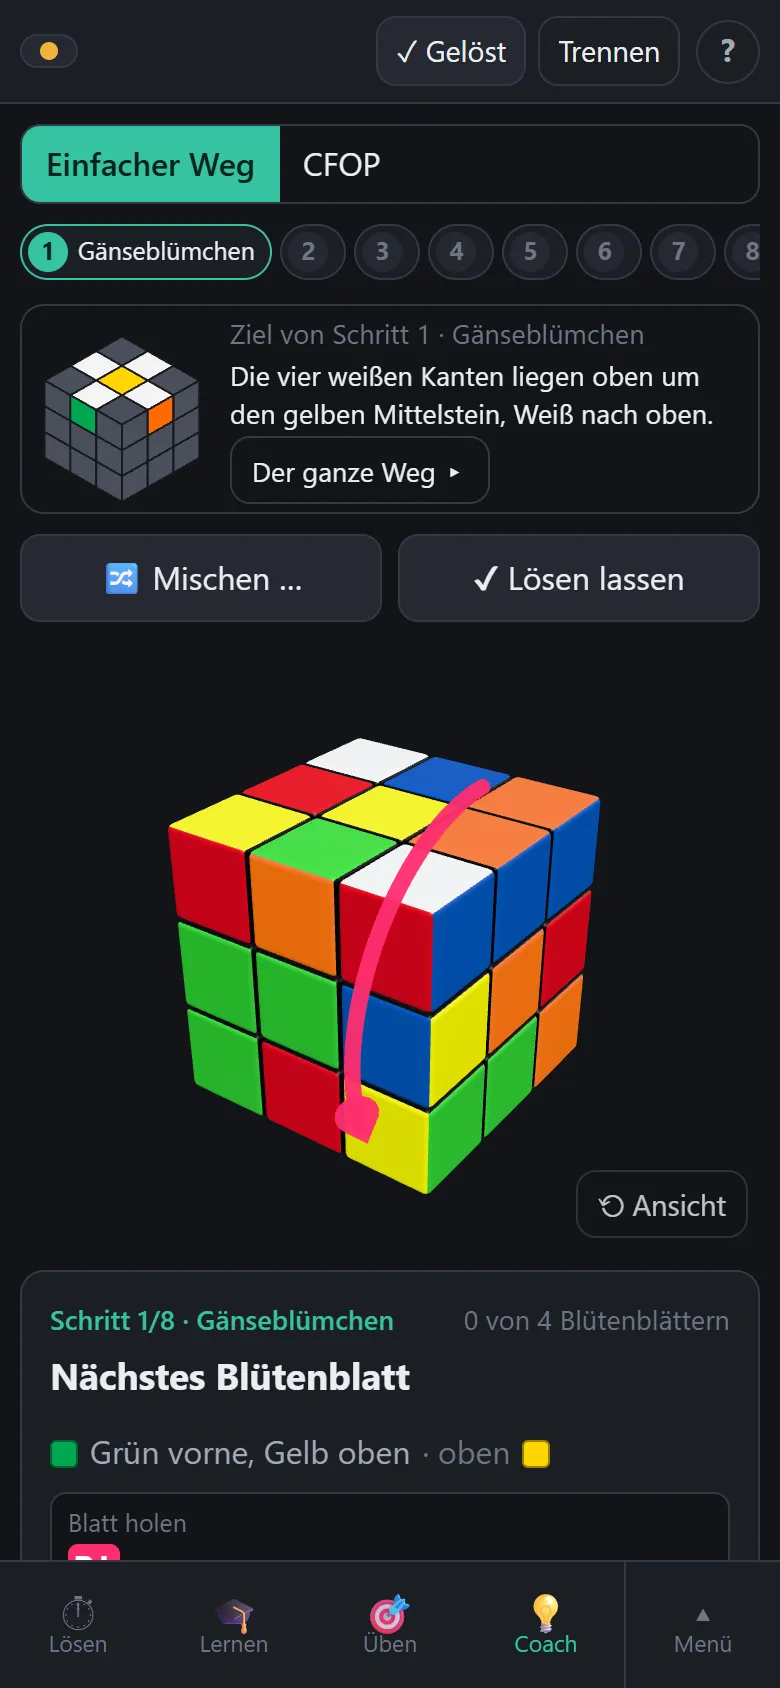
The coach accompanies you while solving a whole cube. It recognises where you are and shows the next step: how to hold the cube, which grip you need, and with an arrow on the 3D cube the next move. It follows every move (“✓ On track”), reports a slip with the way back and recomputes when you take your own way.
The bar with the steps shows the whole way; the current step is highlighted. Next to it stands a small goal picture: this is how the cube looks when this step is done – only the pieces that matter are coloured. The whole way ▸ shows all steps as a sequence of pictures, eight for the simple way, four for CFOP. With 🔀 Scramble … you start at any of these steps, including the last three (yellow cross, top edges, corners placed).
- Simple way – the layer-by-layer method in eight steps, from the daisy to twisting corners.
- CFOP – cross, F2L pairs, OLL and PLL, each with the shortest suggestion. Below you choose 2-look or the full OLL/PLL.
The coach only accompanies. Understanding, looking up and recognising the cases live under Learn, measuring under Practice.
Recognition on the cube (Learn → OLL or PLL → Recognise → With the cube)
- What to practise? Choose the set (full or 2-look). Under Choose cases you take whole groups or single cases – each with picture, name and group. Nothing chosen means: all.
- Start: the coach scrambles one of the cases onto your cube. Follow the arrows. If the cube already shows a case from your selection, the app says so – with Without scrambling it goes straight on to the question which one it is.
- Which case is this? The groups are folded; under each stands how to recognise it. Open the right one and tap the case. Wrong? The app says what the chosen case would look like – compare with your cube and try again. Reveal gives it away.
- Then the coach guides you move by move through the algorithm, with its building blocks.
Whether you recognised the case at first sight goes onto its flash card: recognised moves it one box further, otherwise back to the first.
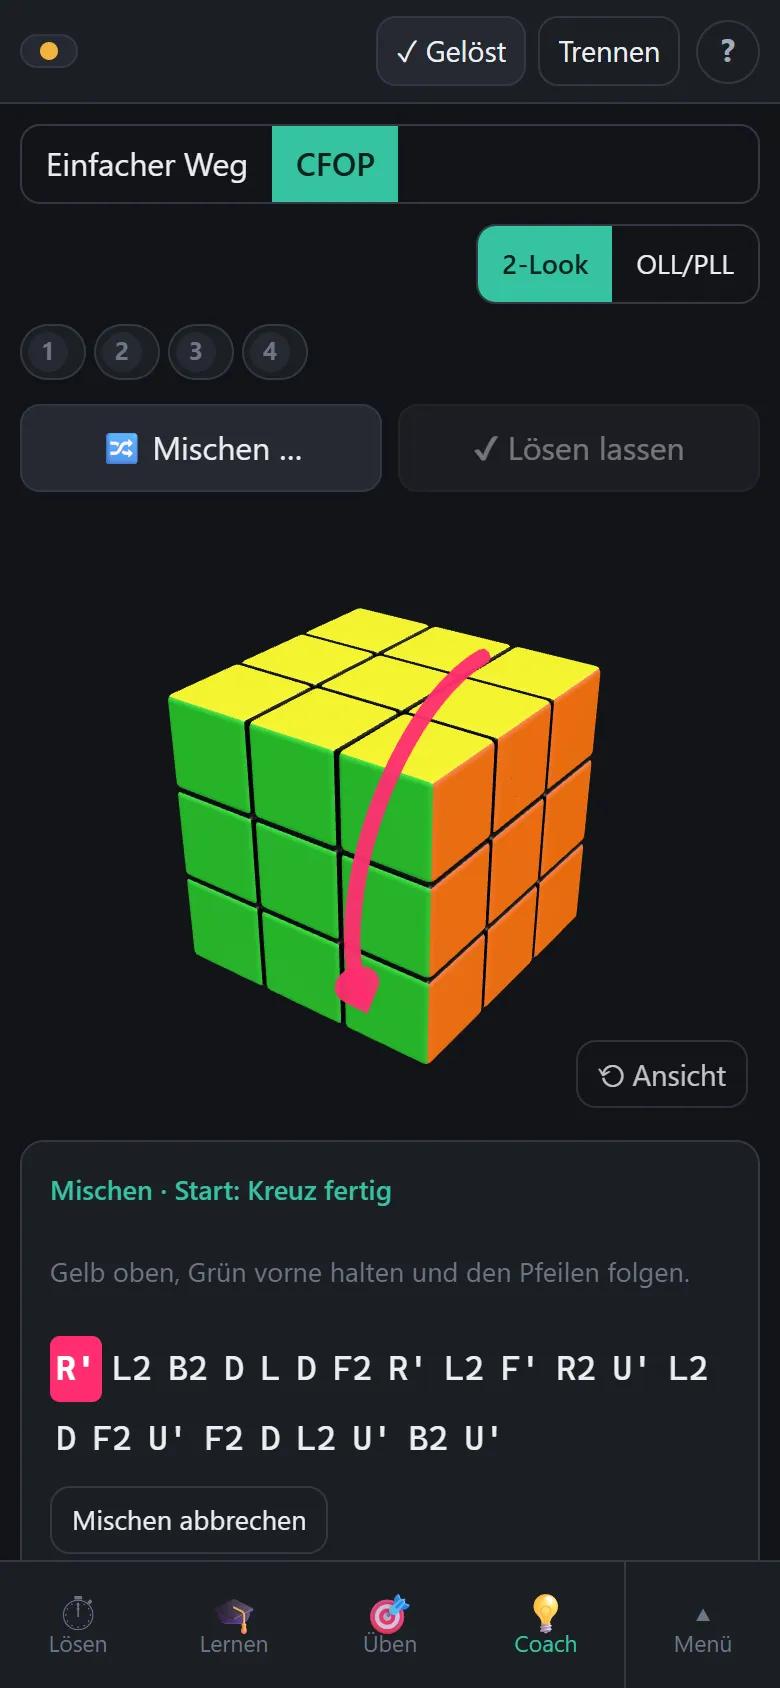
🔀 Scramble … brings the cube into a practice state on purpose: fully scrambled, or with cross, F2L or OLL already done (for the “simple way” the stages of the guide). So you practise exactly the part you want to learn. ✓ Solve for me shows the shortest way from the current state back to a solved cube – good for starting again quickly, but not a learning path. With a scrambled cube in your hand the same way is also under Solve as 🧩 Solve for me, in the row of buttons below the scramble – together with 🎓 Getting started (the lessons for beginners; it carries a dot as long as you have not begun one) and ⏱ Timer mat.
Practice – timing single steps
While the coach accompanies a whole cube, here you practise one step over and over: you get a task, solve it, and the app compares your solution with the shortest. At the top you choose what to practise – cross, F2L pair, XCross, OLL/PLL or the finger tricks:
Start scrambles a task onto your cube. Without scrambling takes the cube as it is: the cross that is still open, the pair with the shortest way, or the OLL/PLL case the app recognises at the top (“The cube shows: …”). So you keep practising without scrambling first – after a timed solve, for instance, or when you built a case yourself. The optimum is then measured on the cube and stands in the task. If nothing is open (cross already done, no case from your selection), the button stays grey.
Cross
Bring the four edges of the cross colour (default: white) into place, matching the centres of the sides. This is the first step of CFOP and the step where planning ahead pays most: good solvers look at the whole cross during inspection and then turn it without looking. Levels 1 to 8 – eight moves are enough for any cross. Start low and plan the whole way before you make the first move. Which colour the cross has, you set under More → Cross colours.
F2L pair
The cross is done. A pair consists of a corner of the bottom layer and the edge that belongs above it in the middle layer. The task names the pair by its two side colours, e.g. “pair green-orange” – this exact one is meant, another pair does not finish the task. Corner and edge are first brought together on top and then inserted together; the cross must stand again at the end. Levels 3 to 8. The first 💡 Hint names the F2L case the pair shows (picture, number, group), the second the next move. Coming via Practise this case from Learn → F2L → Cases, only this case comes, in changing slots.
XCross
Solve the cross and one pair in one go – which pair is up to you. On a whole cube this saves a complete step, but it asks you to track five pieces instead of four during inspection. An exercise for later: only once the cross works reliably at level 6 to 7. Levels 3 to 9.
OLL/PLL
The last layer. The first two layers are done, on top lies a case which you should recognise and solve with its algorithm. The case comes with the top layer turned – aligning it (U, U' or U2) before the algorithm is part of the task. The algorithms are under Learn → Cases.
The sets: OLL, PLL, 2-look
- OLL (57) – make the top face all yellow in one step.
- PLL (21) – then swap the pieces of the top layer into place in one step.
- 2-look OLL – the same in two small steps: first the yellow cross (edges), then the yellow corners. 10 algorithms instead of 57.
- 2-look PLL – first the corners into place, then the edges. 6 algorithms instead of 21.
The usual way: start with 2-look, then learn the full PLL, finally the full OLL. With the groups below you practise only a part of a set (e.g. only the T shapes). With only cases not learned yet only cases come that you have not marked as learned under Learn → Cases. Weak and slow cases come up more often by themselves.
Coming via Practise this case from a case under Learn → Cases, only this one case comes – the top then says “Only: …”. With ✕ all cases set and groups apply again. So the hand learns a new case before it turns up in between in the whole set (How to learn algorithms). If the case already lies on the cube, the task starts right away – without scrambling.
Level and ladder
The level is the number of moves in which the task can be solved optimally – level 4 means: there is a way with four moves and none shorter. With Ladder the level rises by itself as soon as 8 of the last 10 attempts were optimal. “Same case” does not count for that – there you already know the solution.
How it goes
- Tap Start, turn the scramble – then the task is on the cube.
- Solve. The time until the first move counts as recognition, after that as execution.
- Stuck? 💡 Hint shows the next good move.
- Messed up? ↺ Reset gives you the same task from the start: the app shows the way back to the beginning, you turn it, then the task is there again. Cancel ends the task. In both cases the attempt is not saved.
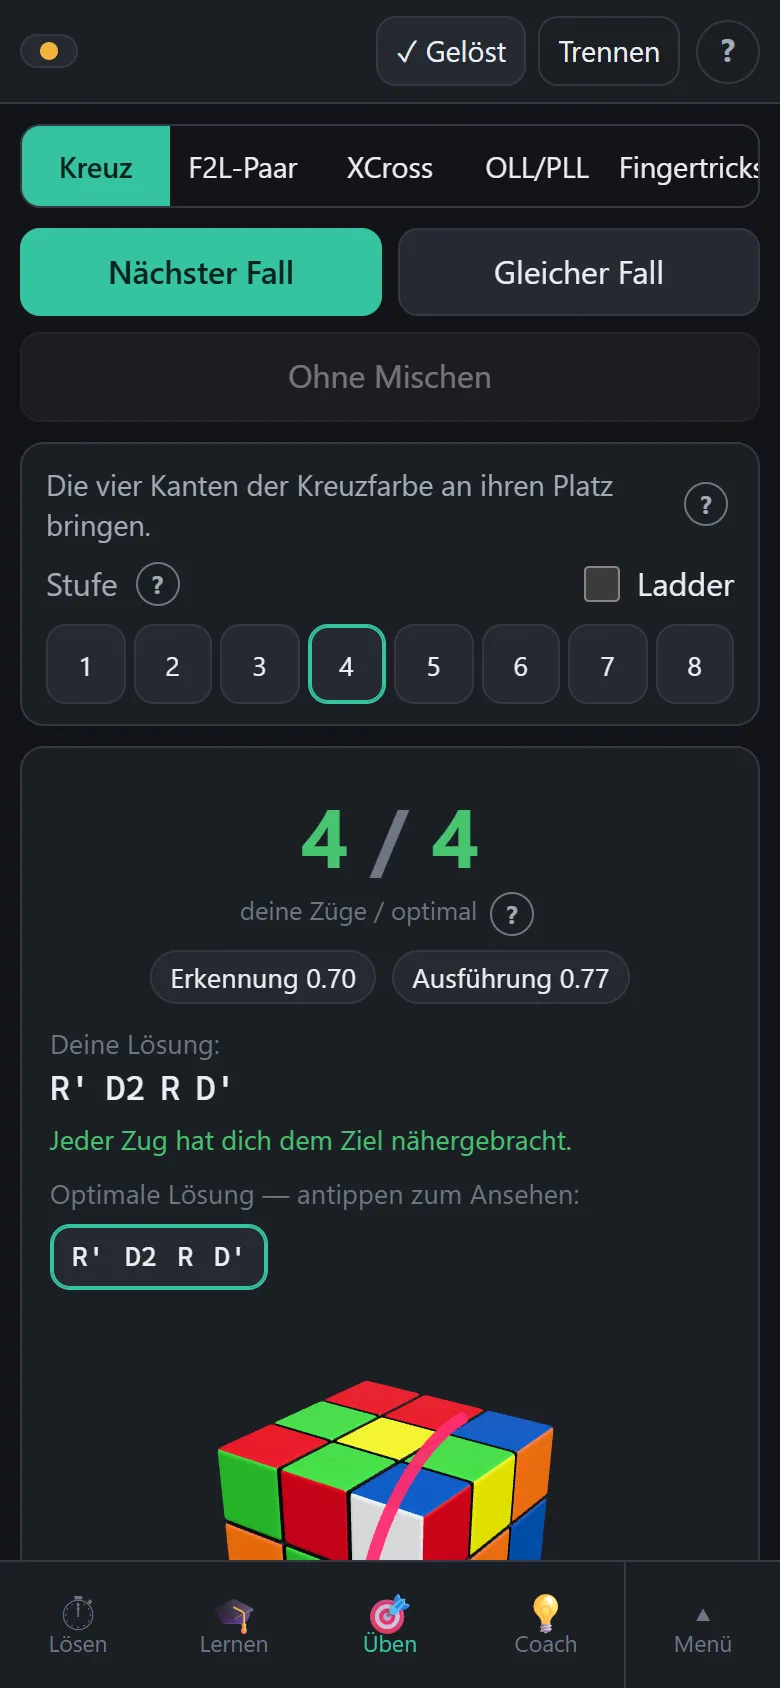
Reading the result
- your moves / optimal – green when you hit the shortest way. For OLL/PLL the length of the algorithm stands on the right.
- Recognition – the time from the finished scramble to your first move: that long you looked and planned. Execution – the time from the first to the last move.
- Your solution – underlined in red are the moves that did not bring you closer to the goal. If nothing is marked, your way was one of the shortest.
- Not turned in one go – appears when you turned a half turn with a stop (see above). The way was right then, only the number is higher.
- Optimal solutions – tap and watch move by move on the 3D cube with Next. Often there are several; take the one that suits your hand best.
Same case gives you exactly the same task once more – good for turning a solution you just looked at right away.
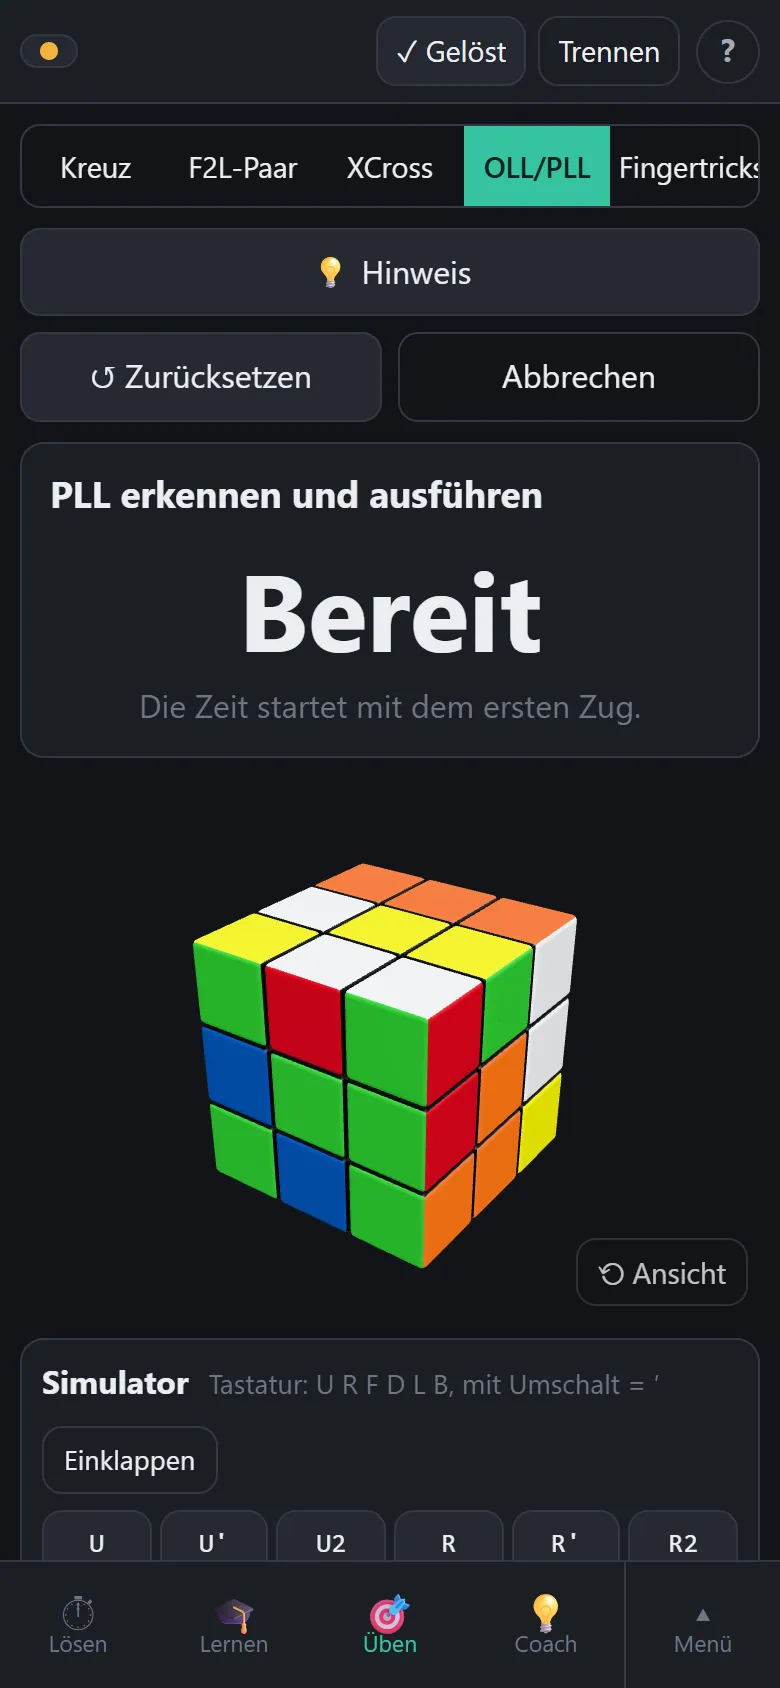
For OLL/PLL, 💡 Hint names the case on the first tap (picture, name, group). On the next it shows the turn of the top layer that puts the case the way the algorithm expects it, and after that its first move. The groups under the set are folded; ▸ Groups opens them.
Learn – understand, look up, recognise
A path along the solve: Basics · Cross · F2L · OLL · PLL. Every stage has the same three parts:
- Understand – short lessons on the 3D cube, with the cube in your hand.
- Cases – the reference: every case with picture, name, group, recognition text and building blocks; own algorithms, favourite, “learned”, and Find case from the stickers.
- Recognise – naming the case: With the cube (a case lies on the cube, you say which, and are guided through the algorithm) or with flash cards without a cube.
Ground rule: Learn explains, Practice measures, the Coach accompanies. Every case stands exactly once, under Cases; the hint in Practice and the coach's suggestion point to it.
Understanding the cross (Learn → Cross)
For the cross there are no cases to memorise – every one is different. Three lessons teach what makes a good cross:
- The goal – what a finished cross is: four white edges at the bottom, each with its second colour at the matching centre. The picture shows only what matters.
- Colours – opposite colours and the order of the four side colours around. Knowing them, the side colour of a white edge tells you where it belongs, without looking for the centre. The app asks until it is right six times in a row.
- Good and bad positions – the app shows a scrambled cube, only the four white edges are visible. Which one do you insert first? After the tap every edge says how many moves it needs and why: white up or down is good (at most two moves), white sideways in the top layer costs three. The app computes the numbers, they are not guessed. Use my cube asks with the cube in your hand.
- Relative, not absolute – the four edges only have to be right relative to each other; one turn of the bottom layer brings the whole cross into place. The app scrambles, you solve the cross so that only this turn is missing, and see your moves next to the optimum in relation – and what it would have cost to bring each edge to its centre one by one.
The 41 F2L cases (Learn → F2L → Cases)
An F2L case is where corner and edge of a pair lie – up to a turn of the top layer. That gives 41 cases in six groups: corner on top with white up, right or front (8 cases each, by the position of the edge), edge in the slot (6), corner in the slot (6), both in the slot (5). The picture shows the cube from the front right top, the slot is front right; the two pieces of the pair are coloured, everything else grey. The top row of the left and the back face is folded outwards so that a piece at the back shows both colours too.
The numbers are this app's own count (by group), not one from the internet. The algorithms are shortest solutions with R, U and F – R and U alone where that costs at most two moves more –, computed and checked by the app's solver. If you prefer another one, enter it and make it the favourite. In Practice (F2L pair) the solver's optimum counts, not the length of the algorithm.
Most pairs are solved without an algorithm once you understand the principle: bring corner and edge together on top (they form a pair when their shared colour lies side by side), then insert with three moves. The groups “white right” and “white front” are the school for that; “white up” and “in the slot” are the cases where an algorithm saves time.
Cases – the reference (Learn → Cases)
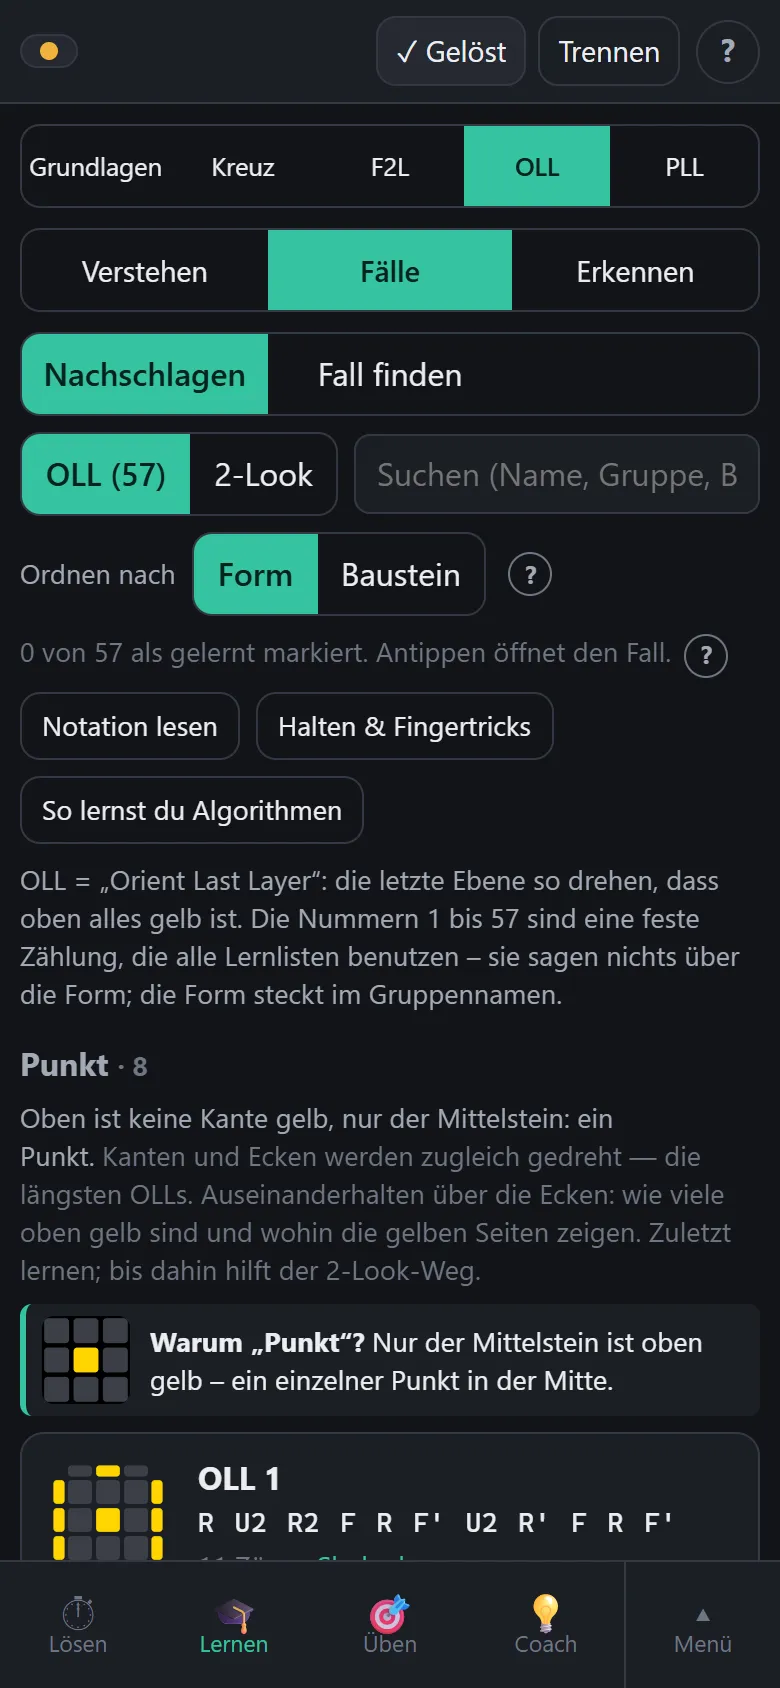
All 57 OLL, 21 PLL and the 2-look cases. An algorithm is a fixed sequence of moves that solves exactly one case and leaves everything else as it was. You learn it not as a row of letters but as a movement – so first slowly and correctly, then faster (see Holding & finger tricks).
At the very top you choose what to do: Look up (the list), Find case or flash cards. In the list you choose the set (OLL, PLL or 2-look); the search field finds cases by name, group, number or building block.
Reading the picture
Every picture is the top view of the top layer, the front is at the bottom of the picture. For OLL only yellow counts: yellow stickers are already oriented, the narrow strips at the edge show where the yellow of the other pieces faces. For PLL the top is already all yellow; here the colours of the strips at the edge count: where three equal colours lie side by side the side is done, where they are mixed, pieces are in the wrong place. Which pieces swap, the name of the case says (“three edges in a cycle”). Turn the top layer until your cube looks like the picture – then the algorithm fits.
Favourite, own algorithms, learned
- Tapping a case opens it. The star ★ marks the favourite – the trainer uses it for comparison and hint too.
- Own algorithm: type it in and add it. The app checks whether it really solves the case and rejects it otherwise. For many cases there are several good algorithms; take the one that suits your hand.
- Tick learned when you can do the case without looking it up. The trainer then leaves it out with “only cases not learned yet”.
- Under the name stand length, the number of your attempts and your average time from the trainer.
How to read the letters is under Notation.
Shapes and building blocks
At the top you choose how the list is ordered:
- Shape – by what you see on the cube: the groups (T shape, fish, dot …). Under each group stands how to recognise it. In the opened case it also says what exactly is yellow for this case or where the headlights are – and how to hold the cube for it.
- Building block – by what you turn. Many algorithms consist of short, always identical pieces: sexy move (R U R' U'), sledgehammer (R' F R F'), Sune, F-sexy-F′ and others. A case stands under every building block its algorithm contains – so you see e.g. all cases with a sledgehammer at a glance.
In the algorithm the building blocks are framed, their name stands below; tapping explains the block. An algorithm of two building blocks is two grips for head and hand, not thirteen moves – that is why it is so much easier to learn. You can practise the blocks on their own under Finger tricks → Triggers.
Why is it called that?
- OLL = “Orient Last Layer”: turning the last layer so that the top is all yellow. PLL = “Permute Last Layer”: then swapping the pieces into place (“perm” = permutation). 2-look = in two looks instead of one.
- The OLL numbers 1 to 57 are a fixed count that all learning lists use – they say nothing about the shape.
- The OLL groups are named after the shape the yellow forms on top: dot (only the centre), line, cross, L, T, P, C, W, square, lightning bolt, fish, knight (like the move in chess). In the list a picture of only the top stands under each group, and what the shape represents – for the fish, e.g., the edges in an L as the tail fin and the corner opposite as the head. “Awkward” has no clear shape.
- The cross cases have names of their own after the yellow on the sides: H, Pi (π), headlights (two yellow stickers on one side like the headlights of a car), T, bowtie. Sune is a proper name, Antisune the Sune backwards.
- The PLL letters are names that stuck. The arrows in the picture show where each piece moves; for T, U and Z they recall the letter, for the others it is just a name.
Find case
You have a case in front of you and do not know which it is? Find case shows the top view to tap:
- OLL: for each piece of the top layer tap where it is yellow – on top or at the edge. Every piece is yellow in exactly one place, so one tap per piece is enough.
- PLL: the top is all yellow. Tap an edge sticker and choose its colour. Four to six stickers are usually enough.
With every tap fewer cases remain. From which side you look at the cube does not matter. Tapping a hit opens it in the list. With a connected smart cube the app recognises the case by itself too (Coach, Solve).
Flash cards
The flash cards practise the part of an algorithm that happens in the head: seeing the case and knowing what to do – without a cube, on the go too. The front shows the picture of the case, turned at random, as it can lie on the cube. Say the name and the building blocks to yourself, then Flip and rate honestly:
- Knew it – the card moves one box further and comes back after 1, 3, 7, 21 days (in the last box after six weeks).
- Did not know – back to the first box, and once more today.
The cards are divided into stages, in the order in which they are best learned (see below). Only a few new ones come per day (adjustable: 2, 3 or 5) – more does not stick. The bar shows how many cards lie in which box: red = box 1, green = box 5. The cards are synced with your account.
How to learn algorithms
The order:
- 2-look: first yellow cross and yellow corners (10 algorithms), then swapping corners and edges (6). With that every last layer can be solved.
- Remaining PLL (15): few cases, and each one saves a whole algorithm. The G perms last – they are the hardest to recognise.
- OLL group by group: first the cases made of known building blocks (T, P, C, lightning bolt, fish), then the middle ones, last the awkward and the dot cases. Until then the 2-look way solves them.
Every day:
- Two or three new cases. Open them, look at the building blocks, understand what the algorithm does.
- With the hands: Practise this case (in the opened case) – slowly, five times in a row, until the fingers know the way.
- In the head: the flash cards – first the due ones, then the new ones.
- In the trainer with the whole set: weak and slow cases come up more often there by themselves.
A case is learned when its card is in the last box and it works in the trainer without a hint – then tick learned.
Basics – for the start
Short lessons, step by step on the 3D cube. The first seven are under Learn → Basics; the lessons on F2L, OLL and PLL stand at their stage under Understand.
- Structure – which pieces the cube is made of.
- Holding – how to hold it so the letters are right.
- The six faces – which letter means which face.
- Turning – letter, prime and 2, with the cube in your hand.
- First sequence – reading and turning R U R' U'.
- Rotating the cube – x y z: the whole cube rotates in your hand. That is not a move, the cube does not report it – the picture shows the new holding.
- Middle slice – M E S and the lowercase letters (r), with the cube in your hand.
- F2L: pairs – what a pair and a slot is; taking a pair out and inserting it.
- OLL: one colour on top – what OLL and a case is; making, recognising and solving a case.
- PLL: swapping pieces – what PLL is, recognising headlights, turning the T perm.
With a connected cube you turn along: the app sees every move and says whether it is right. A wrong move is no problem – it names the move that takes it back. Without a cube, Show me shows the turn on the picture. Every task can be skipped.
For M the picture shows something different from your hand: the cube recognises the middle slice only by the two outer faces turning against it – it reports R and L'. Afterwards your hand holds the cube tilted, and the picture tilts along.
Finger tricks – practising grips (Practice → Finger tricks)
Finger tricks does not practise solving but turning: single moves, short sequences (“triggers”) and the first algorithms – as often in a row as it takes until the hand does them by itself.
- Watch – the sequence step by step on the 3D cube, with the grip for every move: which hand, which finger. You go ahead with Next yourself, nothing runs by itself. At the end Practise now leads to practising.
- Practise – with the cube in your hand. Just start turning: the first turn starts the drill and the time (Start works too). The app follows every move, counts the repetitions and reports a slip right away with the move that takes it back. After a result, only Again starts the next round. Without a connected cube (or with one without Bluetooth, or with the simulator – finger tricks live from the fingers on a real cube) the app measures no time: turn the drill on your cube and tap Drill done – it then counts as practised, without a time.
- The result: the time for all repetitions, turns per second (your pace), slips (moves that did not belong), the longest pause (where you hesitated longest). Half turn split means: a U2 or similar came as two quarter turns with a pause instead of one motion – not a pace problem but the grip: two fingers flick right after each other. From which pause that counts, you set under More → Move count.
- Result – time, turns per second, slips, the place of the longest pause (where the grip stalls) and half turns you did not turn in one motion. Plus the comparison with your best time.
Which finger turns which move is in the next section.
Camera – a cube without Bluetooth
With the camera the app reads an ordinary cube: you capture the faces one after the other, the app recognises the colours and checks whether the state is possible. Then you get the sequence – to the solved cube or into the starting position of an exercise.
- Capture: hold the face in the frame so that the nine stickers lie in the grid, and mind the colour that should be on top – it is stated at every step. Even light without reflections helps; red and orange as well as white and yellow are the hardest to tell apart.
- Correct: after every capture you see the recognised colours. Tap a sticker and choose the right colour. Uncertain stickers are marked.
- Check: if something does not fit – a colour too often, a piece twice, a corner twisted – the app says what and where. Usually it is a wrongly recognised sticker or a face captured rotated.
- Five faces are usually enough. With five faces there, the app offers to compute the sixth. For about every fourth cube this is not unambiguous – then it says so, and you capture the face.
- Two pictures instead of six: on the camera page there are two buttons, 2 pictures and 6 pictures. With two you show the camera a corner – three faces at once – and then the opposite corner. Which: the app names the three colours and shows the coloured dots where the centres belong (first yellow on top, green bottom left, orange bottom right; then white on top, red bottom left, blue bottom right). Hold the corner roughly inside the hexagon and tap Capture – or choose a photo from the gallery (Choose a picture from the gallery, one from the phone's camera app too). The app finds the cube in the picture itself and lays its grid over it: seven rings at the corners. If it does not sit exactly on the cube, drag the rings into place with your finger – the six outside and the corner in the middle at the front; dragging beside the rings moves the whole grid. Then Read. The distance to the camera does not matter, every face is computed in perspective from its four corners. After that it goes on as with six pictures: overview, correct, check; a whole face that is wrong you capture once more on its own, straight on. The search finds the cube by its coloured pieces – in shadow too, without grooves too, even when it fills the frame; the grooves only serve for fine alignment. On a phone it takes one or two seconds. If the grid still sits off, you drag.
- Without a camera it works too: type the colours in by hand.
The whole sequence
After scanning you choose a goal: Solved, Cross done, Two layers done or All yellow on top. The app shows the whole sequence in rows of five. Turn it on the cube and tap ✓ All turned – then the app knows the new state. Below you can watch the same sequence move by move on the picture.
Guided move by move
In the coach and in the trainer the app shows the next move, you turn it on the cube and tap ✓ Turned – the app cannot see the moves of this cube. Your own moves you enter with the keys below the 3D cube.
Holding and finger tricks
You do not get fast by hasty turning but by keeping the hands on the cube. A finger trick is a turn that a single finger flicks without regripping. Most algorithms are laid out for the right hand (many R and U) – that applies to left-handers too. What stands here are the usual grips; if a move works better for you with another finger, that is just as right.
The home grip
- Both hands hold the cube at the sides: thumbs in front on the front face, middle and ring fingers at the back, each in the middle or bottom row. The left hand holds the left face, the right the right.
- The index fingers stay free and rest on top at the back corners – they turn the top layer.
- Hold loosely. Clamping the cube blocks the layers and forces a regrip for every move.
- You solve with white at the bottom, yellow on top. Rotate the cube as a whole as little as possible – every cube rotation costs time and you lose sight of the pieces.
Which finger turns what
| Move | How it goes |
|---|---|
| R R' | Right wrist: the whole right hand tilts up (R) or down (R'). The fingers stay where they are. |
| L L' | The same with the left wrist. |
| U | The right index finger reaches the top layer at the back and pulls it round to the right. |
| U' | The left index finger reaches in at the back and pulls round to the left. |
| U2 | Double flick: right index finger, right middle finger right after – one motion, no stopping. The same with the left hand in the other direction. |
| F | The right index finger reaches the top of the front layer and pulls its top edge to the right. Most comfortable when the right hand has just tilted down (after R'). |
| F' | The right thumb pushes the front layer up at the bottom right. Or the left index finger pulls its top edge to the left. |
| D D' | The ring fingers reach the bottom layer at the back: the left pulls it round to the left (D), the right to the right (D'). |
| B | Awkward and rare – the hand has to regrip for it. Good algorithms avoid B. |
| M' M | Middle slice. M': the left ring finger reaches the slice at the bottom and pulls it forward. M: the index finger pulls it forward at the top. |
| r f | Wide turns: like R or F, but the hand grabs two layers. The left hand holds only the left layer. |
Three grips to practise
- The sexy move R U R' U' – wrist up, right index finger, wrist down, left index finger. Six times in a row brings the cube back to the starting state: the best dry run there is.
- The sledgehammer R' F R F' – wrist down, right index finger pulls F, wrist up, left index finger pulls F'.
- Sune R U R' U R U2 R' – the first whole algorithm where the right hand never lets go of the cube.
What really makes you faster
- Half turns in one move. R2 is one wrist movement, U2 a double flick. Stopping after the first quarter turn loses time – and the app counts two moves instead of one.
- No regrips. If an algorithm only works with regripping, there is usually a better one – under Learn → Cases you can enter your own.
- Slow and fluent beats fast and halting. Practise an algorithm so slowly that no pause arises, and only then get faster.
- Look ahead. While the hands execute one step, the eyes already look for the pieces of the next. That is why the app measures recognition separately.
- The cube has to play along. A speedcube forgives imprecise turns (“corner cutting”). If it sits too tight or too loose it can be adjusted – how, is in the manual of your cube.
Notation – reading the letters
Every letter is a face, seen in your holding:
| Symbol | Meaning |
|---|---|
| U D | Up top, Down bottom |
| R L | Right, Left |
| F B | Front, Back |
| R | quarter turn clockwise – as if you were looking at that face |
| R' | counter-clockwise (say “R prime”) |
| R2 | half turn, the direction does not matter |
| r f u | lowercase = wide turn: the face together with the middle slice next to it |
| M | the middle slice between left and right, direction like L |
| x y z | rotate the whole cube: x like R, y like U, z like F |
Stats
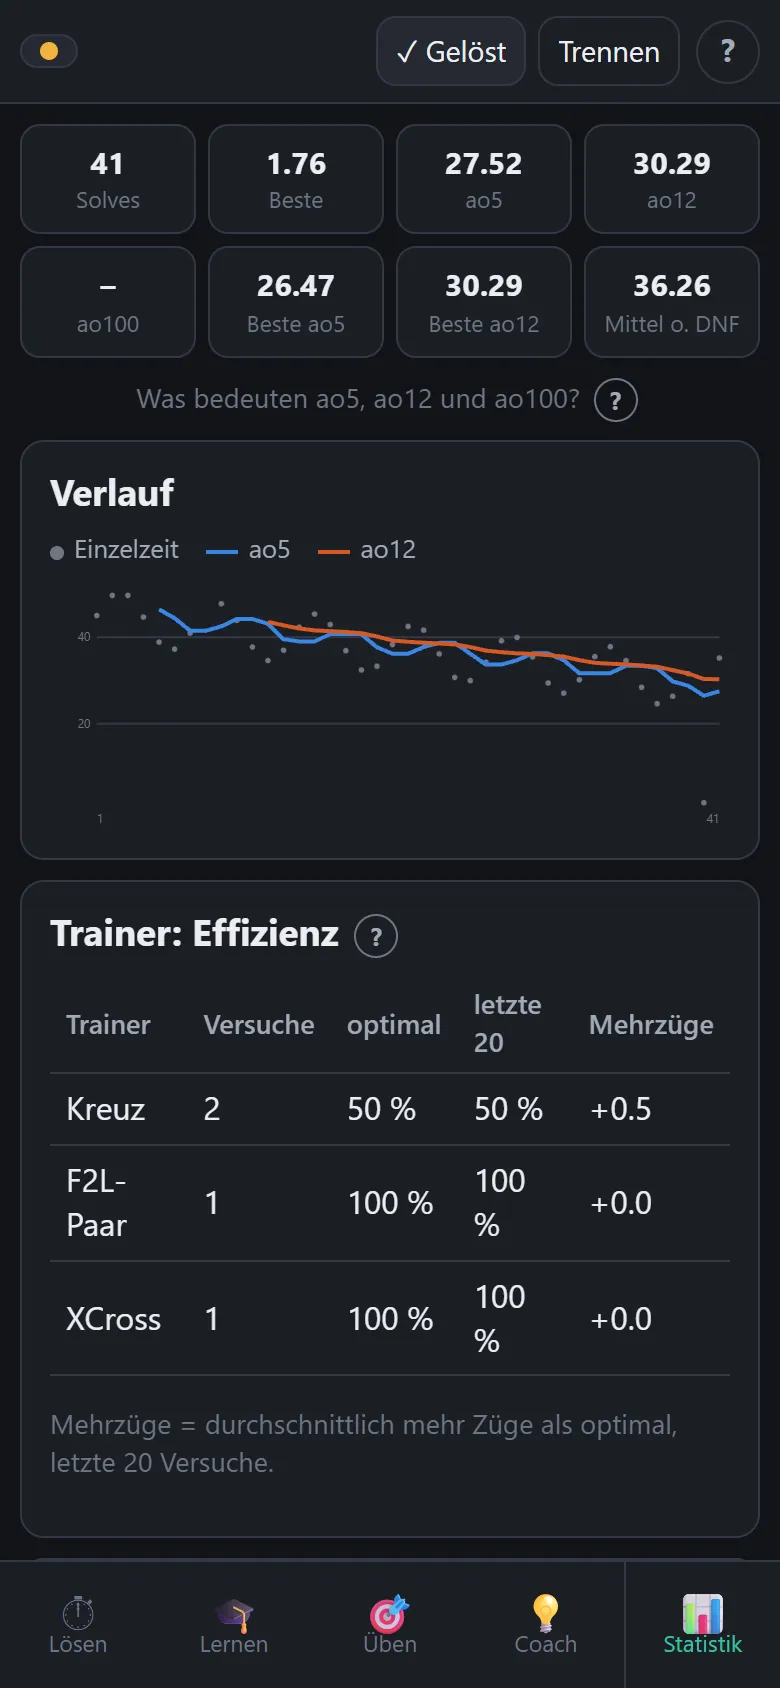
Number of solves, best time, ao5, ao12, ao100 and their bests, the history as a curve, the efficiency in the trainer (how often optimal, how many moves too many) and the slowest OLL/PLL cases. Every solve can be watched as a replay with a timeline.
If you have solved with more than one cube, choose at the top under Cube which one counts: all, a particular one, or the times without a cube (simulator, not given). Everything below follows the choice, except the list of slowest cases.
- ao5 / ao12 / ao100 – the average of the last 5, 12 or 100 solves, with the best and worst times dropped (one each for ao5). A single outlier does not spoil the value. “Best ao5” is the best such average you ever had. DNF counts as the worst time; too many of them make the whole average a DNF.
- Trainer: efficiency – optimal is the share of attempts in which you hit the shortest way, last 20 the same share for the most recent attempts only (so you see whether it gets better), extra moves how many moves above the optimum you were on average.
Your practice data is synced with your account and available on every device you sign in on. You can also export it as a file. Delete all deletes solves and trainer data in the account too; own algorithms are kept.
More – settings
The tab More sits in the Menu ▴ at the bottom right.
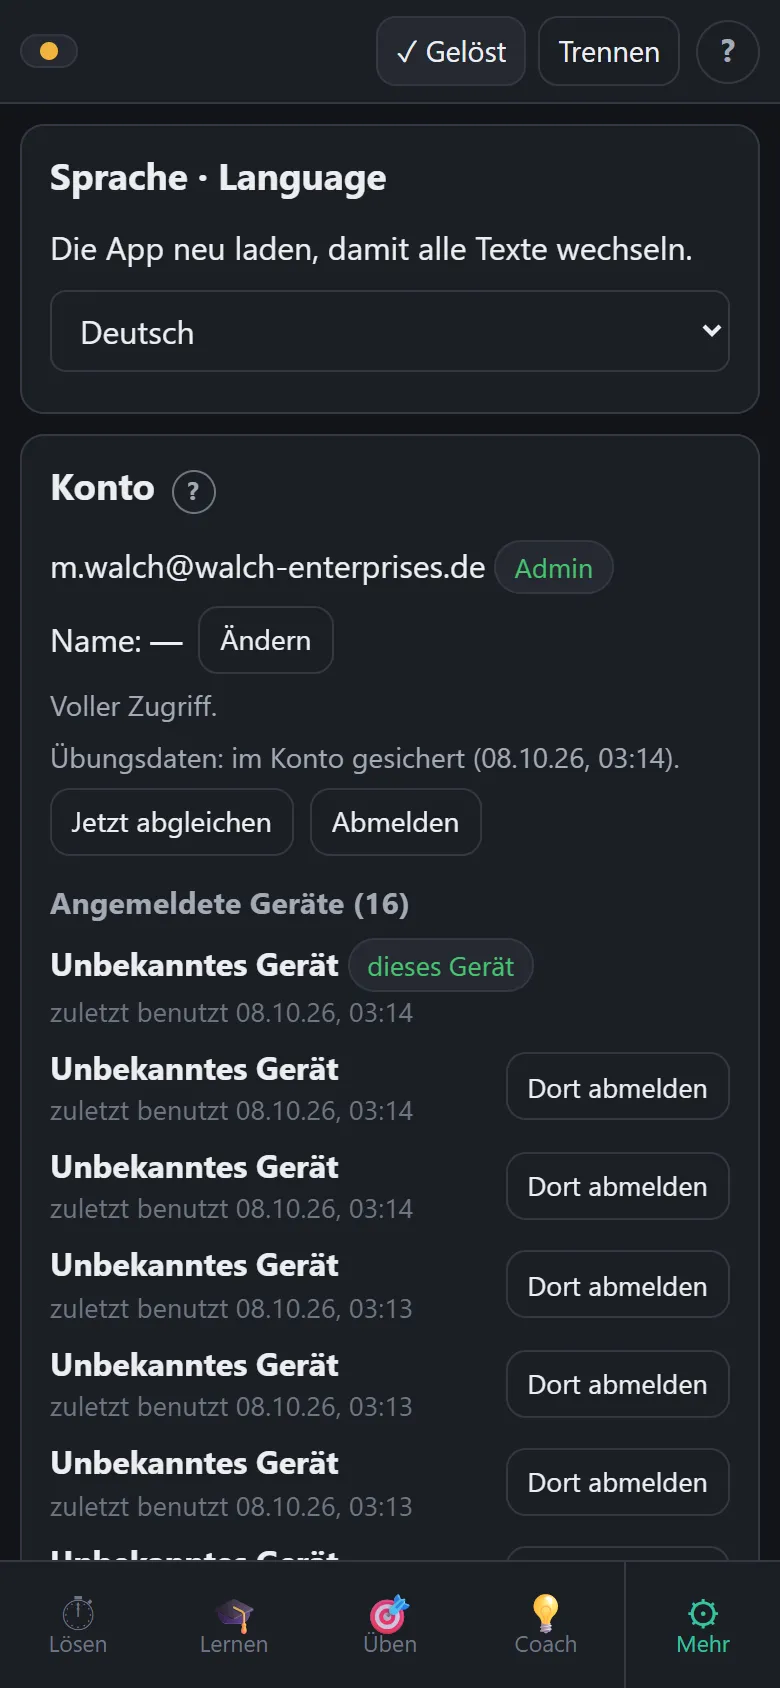
- Account – name, licence, state of the sync, sign out. On signing out your practice data is saved to the account first and then removed from the device. Below are the signed-in devices (at most three, each browser counts on its own); sign out another device there, e.g. someone else's PC. Signing in on a fourth ends the sign-in unused for the longest. At the very bottom of the page, in the red Danger zone, “Delete account …” deletes the account with all data in it; to confirm you enter your e-mail address. What is deleted and what remains is explained under Delete account. The language card at the top switches between German and English.
- Holding – which colour faces you, and whether the 3D cube follows the real cube (gyroscope; not in the coach). All moves and pictures of the app refer to this holding.
- Look of the cube – Automatic shows a plain cube of coloured plastic and changes into the shape of the GAN 16 (grooves, round centre cap) as soon as one is connected. Plain and GAN 16 fix that; Stickers shows black pieces with flat colour fields, very easy to read. This is only the look; nothing changes in the behaviour. The colours of the plastic are measured from photos of a GAN 16.
- Coach – simple way or CFOP, arrow on or off.
- Timer – inspection 15 s or unlimited, sounds, screen stays on.
- Cross colours for the trainers – with one colour you always practise the same cross (usually white). With several, the trainer picks one of them at random – so you learn to build the cross on any colour (“colour neutral”). For the start: one colour.
- Move count – how much time may lie between two quarter turns of the same face so that they count as one move (see Turn half turns in one move), and how fast the 3D cube draws a move.
- Support – a question, bug or wish straight from the app. If you like, the connection log goes with it (cube, connection steps, errors); the answer comes by e-mail.
- Cube & connection – battery, connection log and My cubes: every smart cube is added by itself when it first connects; “Rename” gives it your own name, which the bar at the top shows too. Enter cubes without Bluetooth below and choose them under “I solve with” when timing on the mat. Every time remembers its cube. “Get state from the cube” reconciles the display with what the cube itself knows.
Set orientation – so the picture follows the cube
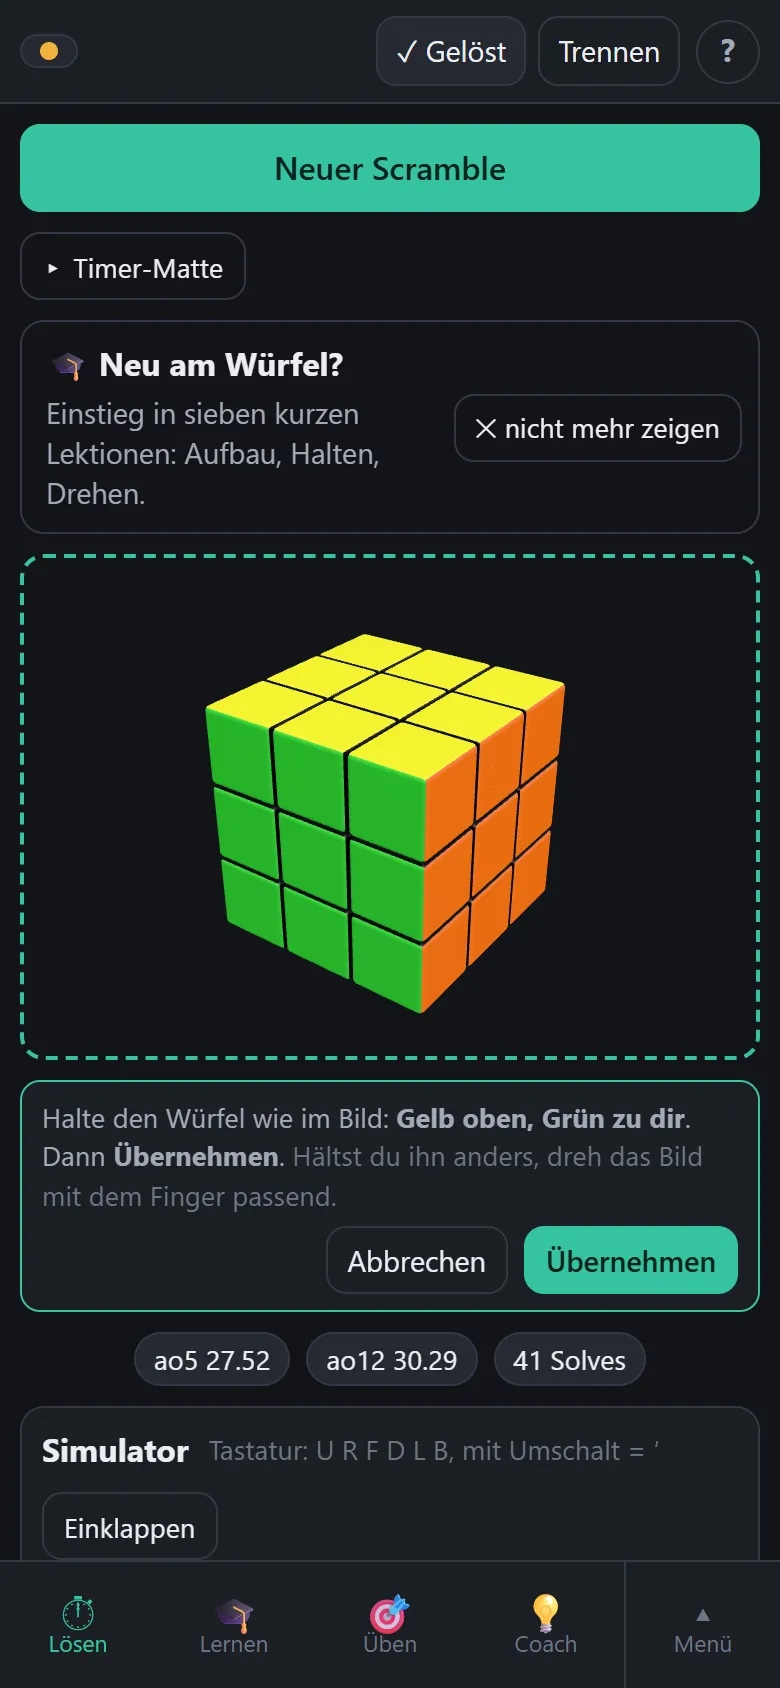
The cube reports how it rotates – but not how it lay at the start. On connecting, the app assumes it lies as in the picture (yellow on top, your front colour facing you), and the picture follows your hand at once. If it lay differently, the picture turns along skewed – then set it right once: tap ⟲ Set orientation, hold the cube as in the picture and Apply.
- If you prefer to hold the cube differently, turn the picture into your holding with your finger before applying.
- If the cube only fell asleep and still lies as before, the app keeps the orientation after reconnecting by itself. Otherwise it has to be applied once more.
- The orientation cannot be computed from the pieces: they say how the cube is twisted in itself, not how you hold it.
When the picture drifts over time
The orientation sensor measures how fast the cube rotates and adds that up. Every measuring error adds up too; a compass that could set it right the cube does not have. So the picture can lie differently from the cube in your hand over time.
- At rest the sensor hardly drifts (measured on the GAN 16: under 1° per minute).
- While turning the error arises. What is lost there the app cannot know. Then: hold the cube as in the picture, ⟲ Set orientation, Apply.
- Under More → Holding a compensation for the drift at rest can be switched on. It is experimental and normally not needed.
Measuring the orientation sensor
Under More → Cube & connection → Orientation sensor the app measures in about three minutes how well your cube knows its orientation: first 30 seconds at rest, then four movements – moves only, slow rotation, fast rotation, like solving. After each one you put the cube back exactly where it was and tap to continue. Best it lies in a corner made of two fixed edges, say two books at a right angle. The result can be copied.
Terms
- Notation (U R F D L B)
- The six faces: Up, Down, Right, Left, Front, Back. A letter alone = quarter turn clockwise (seen from that face), R' = counter-clockwise, R2 = half turn. x y z rotate the whole cube.
- Scramble
- The scramble sequence. The app generates a random state, as in competition.
- HTM
- Half Turn Metric – every face turn counts as one move, a half turn (R2) too – provided you turn it continuously. With a stop in between it counts as two moves.
- TPS
- Turns per second.
- Inspection
- The time for looking before solving, 15 seconds in competition.
- +2 and DNF
- Penalties from competition: +2 seconds (e.g. inspection slightly overrun), DNF = did not finish (invalid).
- ao5, ao12, ao100
- Average of 5/12/100: mean of the last solves without the best and worst (one each for ao5).
- Cross
- The four edges of the bottom face in place – the first step of almost all methods.
- F2L
- First two layers. In CFOP in four pairs of corner and edge.
- XCross
- Cross and the first F2L pair solved together.
- OLL
- Orientation of the last layer – making the top face one colour. 57 cases.
- PLL
- Permutation of the last layer – swapping the pieces of the top layer into place. 21 cases (T perm, Y perm …).
- 2-look
- OLL or PLL in two smaller steps with far fewer algorithms – the usual start.
- CFOP
- Cross, F2L, OLL, PLL – the most common method for fast solving.
- Algorithm
- A fixed sequence of moves for a particular case.
- Ladder
- Automatic level rise in the trainer as soon as 8 of the last 10 attempts were optimal.
- Recognition / execution
- Recognition = time until the first move (recognising the case), execution = time for the moves.
Frequently asked questions
The Android app says “no Bluetooth”.
The app from the Play Store is a shell around this page and runs in Chrome, because only Chrome on Android offers Bluetooth to web pages (Samsung Internet and Firefox do not). If Chrome is disabled or not installed, the shell takes the default browser: learning, camera, simulator and stats keep working, only “Connect” does not. Fix: Settings → Apps → Chrome → Enable (or install it from the Play Store), then open the app again. The app shares sign-in and data with Chrome.
The cube does not connect.
Turn the cube (wake it up), check Bluetooth, use Chrome or Edge. Some browsers (e.g. the Samsung browser) offer Bluetooth but show no device chooser – the app reports that after a few seconds. The cube does not show up in the Windows Bluetooth menu, by the way; that is as it should be.
The 3D view turns wrong.
Turn F once: with green in front the green face must turn. If the whole state is wrong, solve the cube and tap ✓ Solved. If only the picture lies differently in space from your cube: Set orientation.
My times are not there on the other device.
Sign in with the same account – the data comes with the next sync. You see the state under More → Account; there is also “Sync now”.
The screen goes off.
Switch on “Screen stays on” under More → Timer. In power-saving mode some phones do not allow that.
Coach and trainer are locked.
They need a valid licence. Free are Solve, Stats, all lessons, the cases, flash cards and finger tricks. A newly created account has everything free for three days (trial) – under More → Account it says until when. After that a one-time purchase unlocks the full version for good – in the Android app with the button Buy full version on the locked page.
Imprint (German) · Privacy · Licence terms